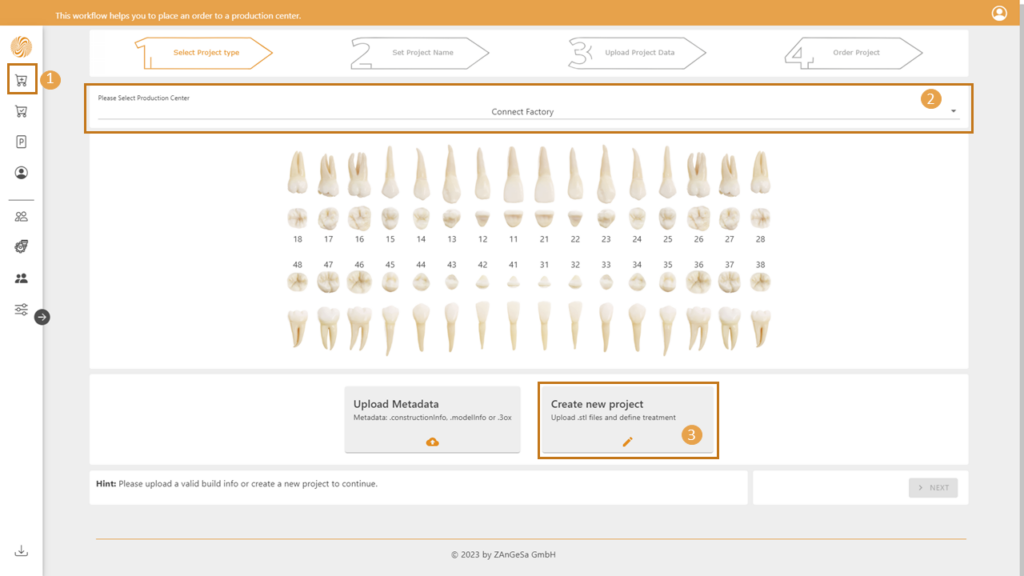
- Select the create order option
- Select the production center from the list. The last selection will be remembered and preselected (in case of only one production center contact this contact is preselected)
- Select the Create new project option
Step B2
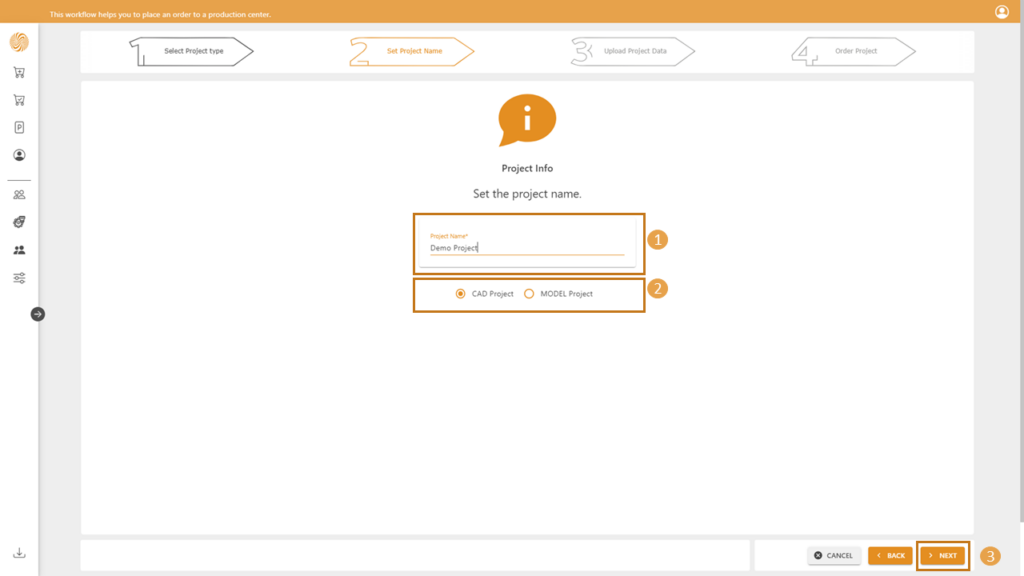
- Define the name of the project
- Select if it is a design case (CAD Project) or model case (MODEL Project)
- Press Next to continue
Please note that the handling of the model projects are not configured for all production centers cost calculations.
Step B3
Setup your project by selecting the teeth to define the indications:
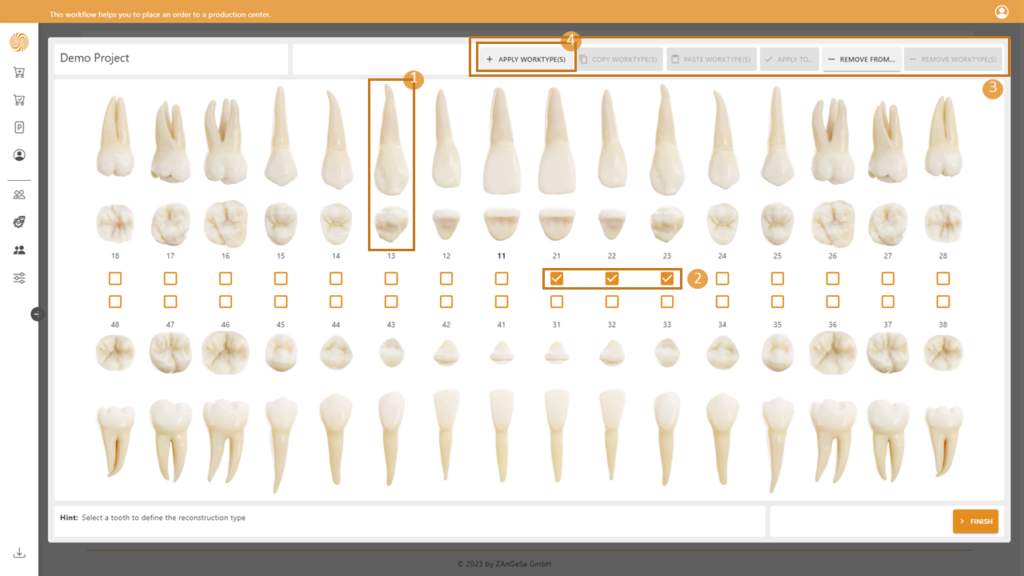
- Click on a tooth to select a single teeth, this will lead you to the setup described on the next page
- Click on the checkboxes to select a set of teeth
- In case of selection over the checkboxes different options are available (like copy/paste of indications, applying an indication for all upper/lower jaw teeth, removal of indications from upper/lower jaw teeth, etc.)
- In case of selection over checkboxes proceed with the Apply worktypes button to select the indication, described on the next page
To setup the indication for the selected
tooth/teeth:
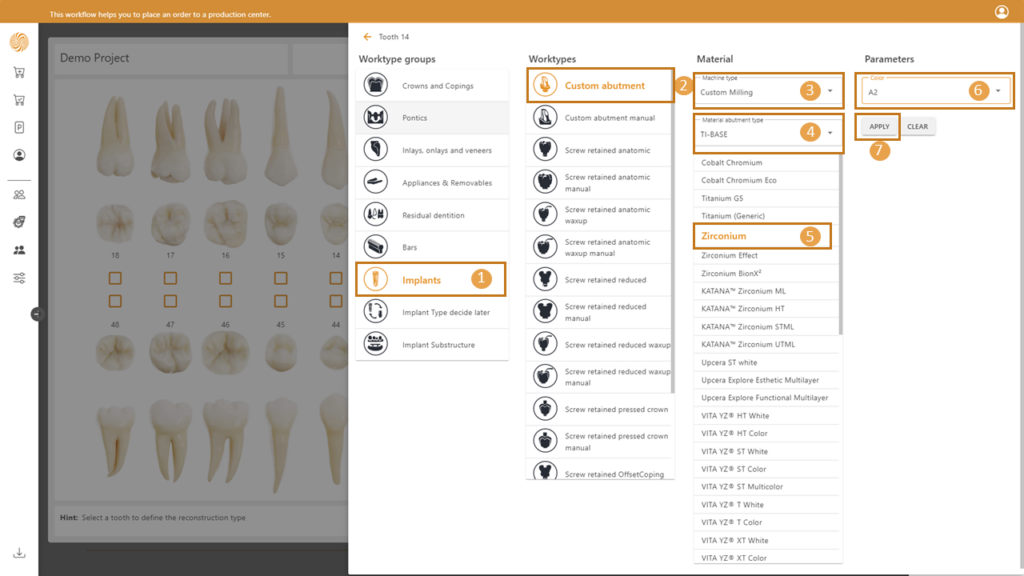
- Select the worktype group
- Select the worktype
- Select the machine type (this is based on the setup of the worktype definition)
- Optionally available: In case of implant related indications select the material abutment type
- Select the material
- Optionally available: In case if the material has color options, select the desired color
- Apply the indication on the selected tooth/teeth
After the setup of the indications you can define additional information:
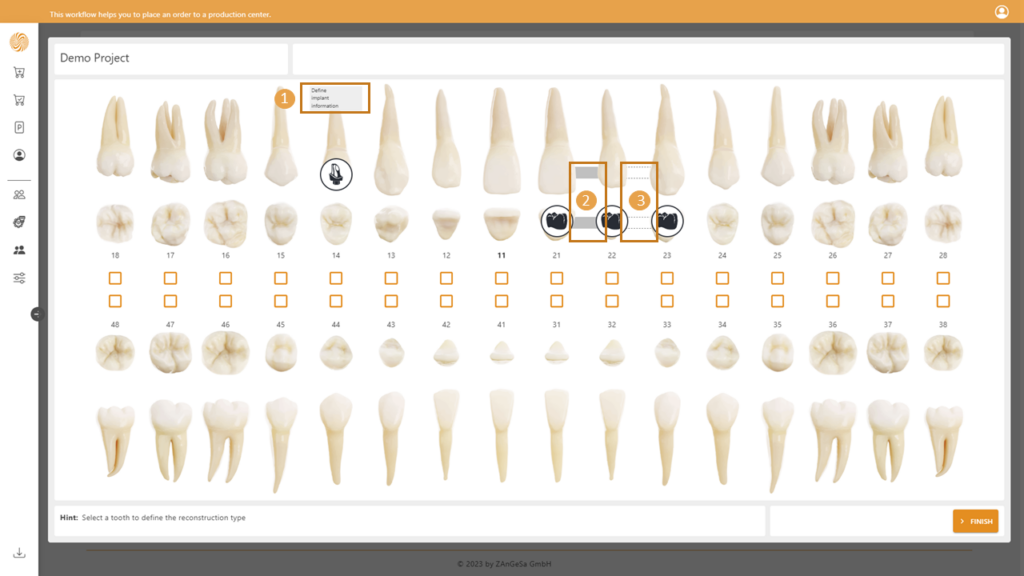
- In case of implant related indications the information about the implant system can be set by clicking on the marked region
- In case if the neighboring teeth having the same material and the indication type allows that the teeth can be connected into a bridge. This can be done by clicking on the connector between them. The case indicates that teeth 21 and 22 are connected as bridge.
- Indicates a case where the connection would be possible, but it is not set. Teeth 22 and 23 are not connected as a bridge in this case
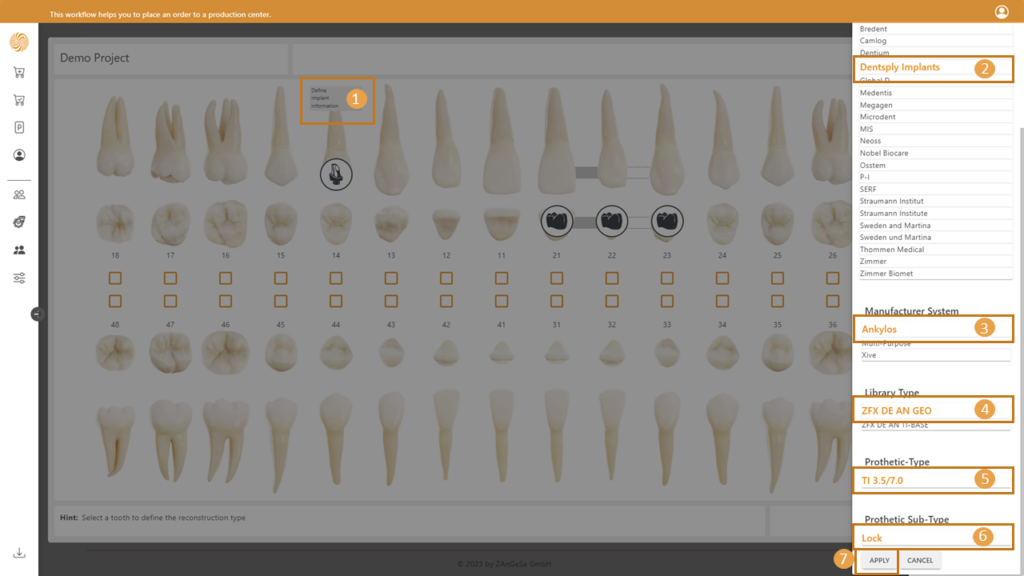
- To define the information about the implant system, click on the area Define implant information
- Select the Manufacturer Name
- Select the Manufacturer System
- Select Library Type
- Select Prothetic Type
- Select Prothetic Sub-Type
- Apply the setup
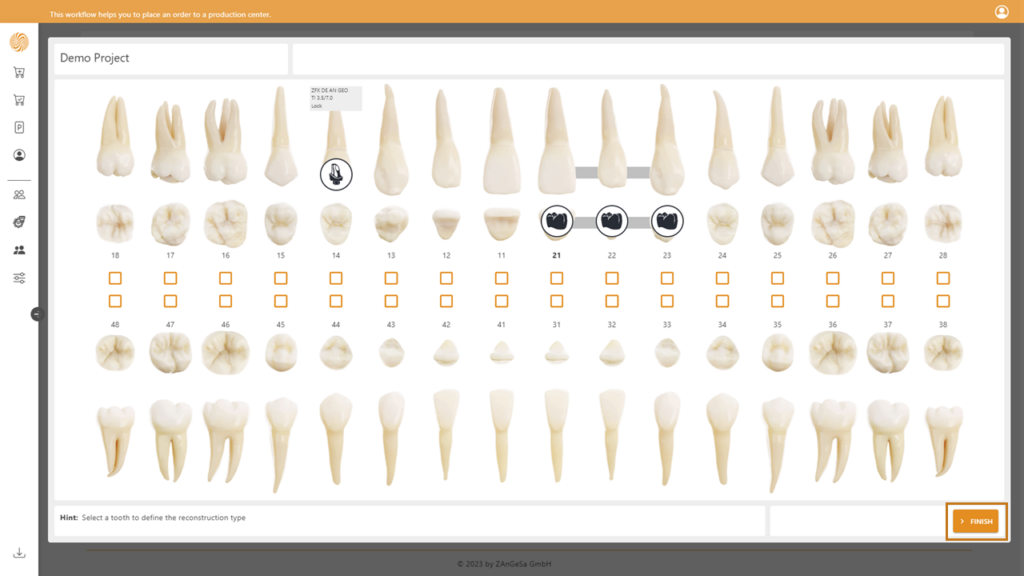
After the project is setup continue with the Finish button to upload the design data described on the next page
Note: It is possible to modify the project data (indications, materials, colors, bridge setup, implant information) also after the design data upload. To do so please click on the teeth overview shown on the next page.
After the indications were defined upload the design/model data. The color coding of the user interface helps you to assign the right design/model to the right indications (teeth). The background color of the teeth, the color of the upload button and the color of the 3D model are showing you the relation.
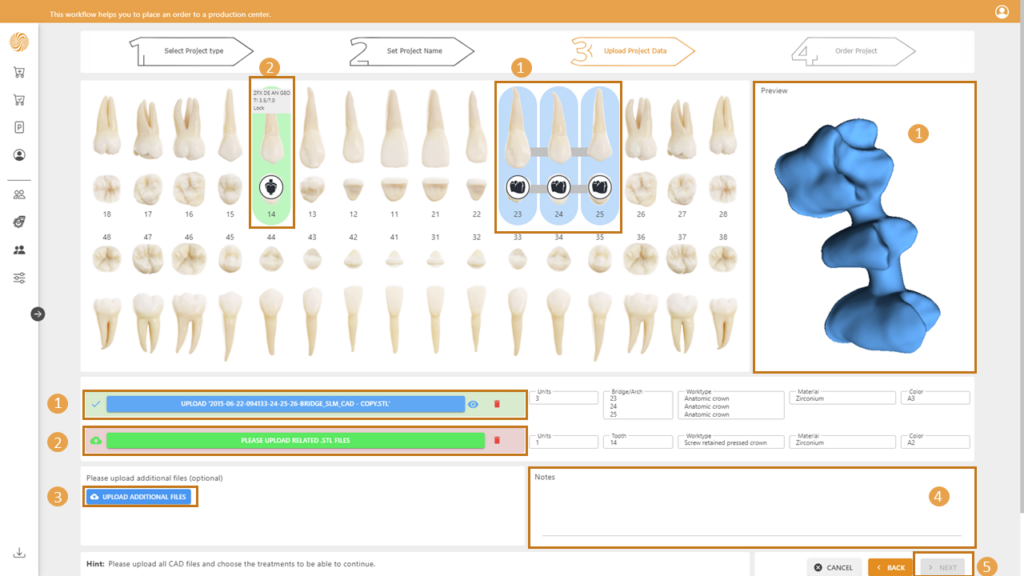
- The design data related to the bridge defined on teeth 23-24-25 has the blue
color coding. The related upload button has also the blue color. The 3D View shows the uploaded model of the bridge – in blue color. The upload button shows the filename of the uploaded file – the light green color of the panel behind the button indicates that the data was already uploaded. - The design data related to the indication defined on tooth 14 has a green color. The upload button has also a green color. The data was not yet uploaded – this is signalized with the light red color of the panel behind the upload button.
- Optionally you can upload additional files useful for production.
- Write notes for the production center – optional.
- The Next button will be available when all the necessary data were uploaded (the list of necessary data comes from the definition of the project).
Note: You have to upload all the design data defined by the project. In case if you miss the data, remove please the related indications from the project.
Step B4
Finalize the order – the functionality of this page is identical with the functionality of
Placing an order: Based on Metadata – Step A.4