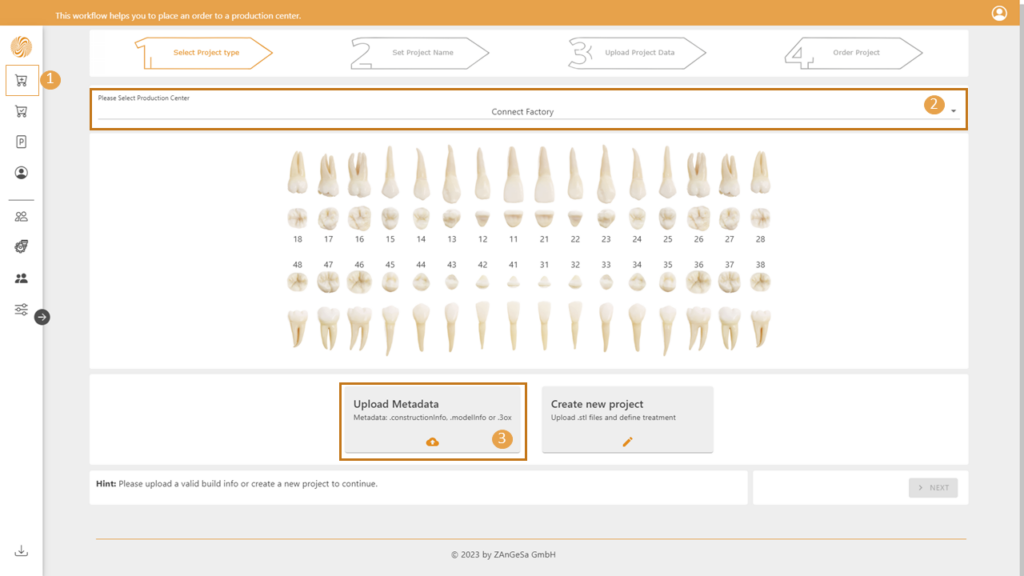
- Select the create order option
- Select the production center from the list. The last selection will be remembered and preselected (in case of only one production center contact this contact is preselected)
- Select the Upload Metadata option to upload the construction info or model info.
Please notice that model info cases you can order only if your production center contact supports this.
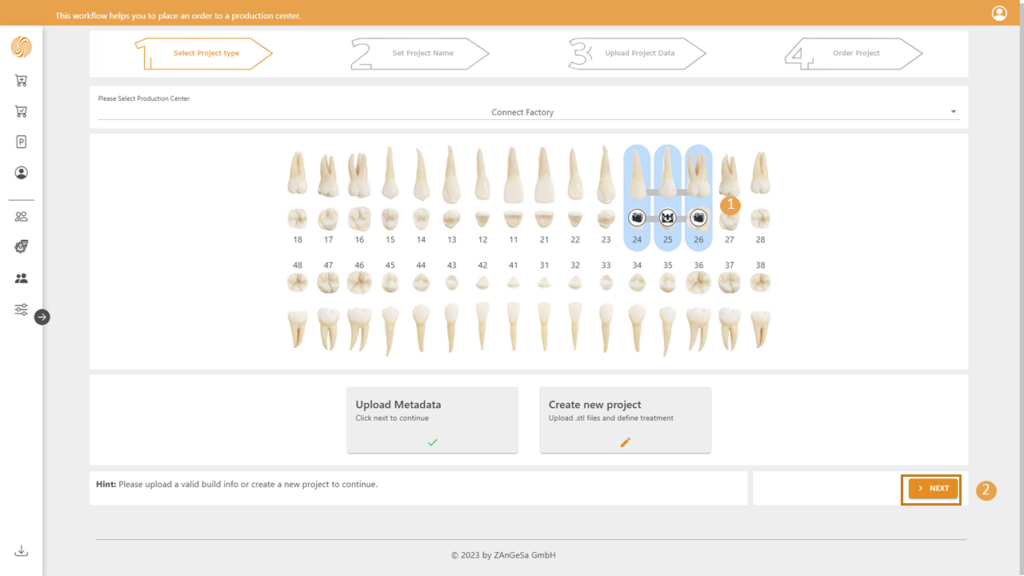
- After the metadata was successfully loaded and processed you can check the loaded project information
- The Next button gets enabled and must be pressed to proceed option
Please notice that during the first run the application fetches from the server the worktype definition, dependent on the size, this can take few seconds. This information is cached and will be reused. In case if the worktype definition is updated, the application fetches the new version.
Step A2
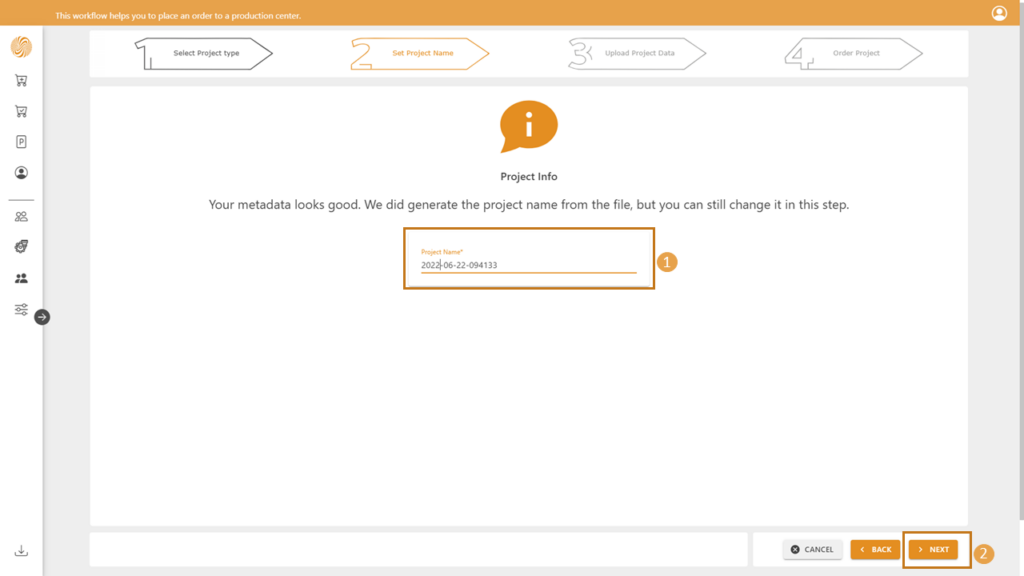
- The name of the project is read from the metadata, it can be edited
- Please press Next to proceed
Step A3
Upload the mandatory design/model data necessary for the production – defined by the metadata. The upload buttons related to the missing data are marked with the light red coloring of the panel behind the button, signalizing there a user action is necessary.
Optionally upload additional data.
Notes can be added for the production center.
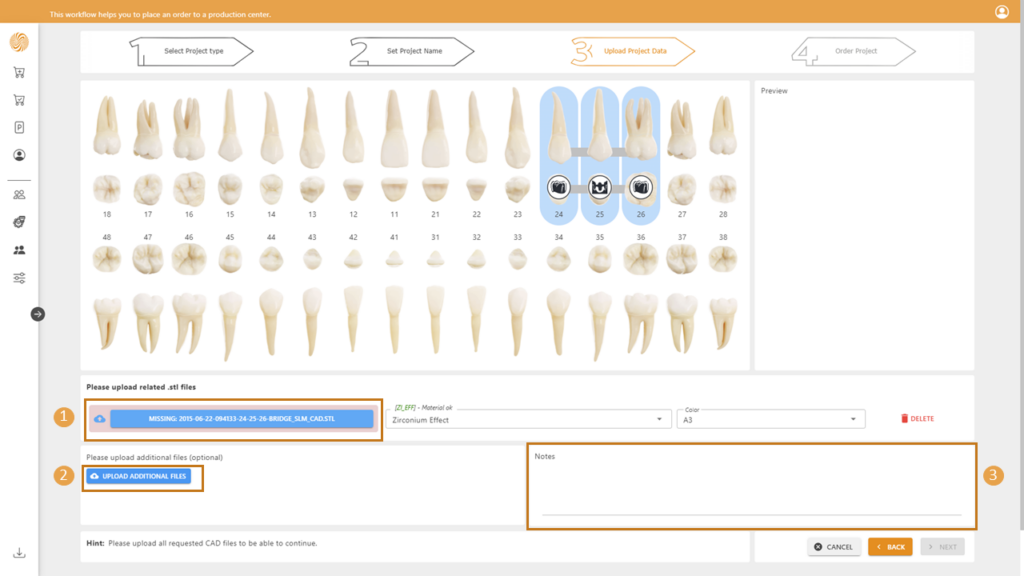
- Select the related file by clicking on the button. If the project defines more production files repeat this process
- Optionally select additional files you want to transfer to the production center.
- Write a note for the production center – optional
Tip: Use multi selection in the file selection dialog to upload more files at the same time to improve your productivity!
Description of additional functionality:
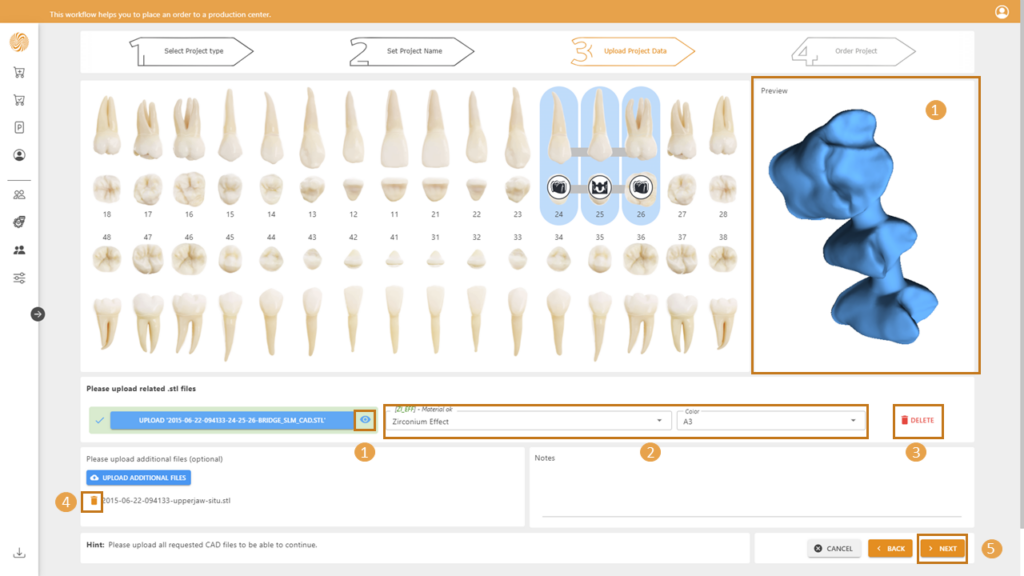
- By clicking on the eye icon switch to the given design/model in the 3D View (useful in case when having more design data defined in the project)
- Allows to change the material/color information defined by the metadata. When this information is changed a note will be generated to inform the production center (as this may lead to issues in production)! The info next to the Material Changed note shows the originally set material.
- Delete the indication from the metadata – this design/model data will be not produced. At least one indication must be defined, and the related design data uploaded! Otherwise, it is not possible to place the order.
- Remove additional data
- Go to the next step
Restrictions related to metadata in 3Shape exchange order format – the functionality works only in browsers running under Windows OS!
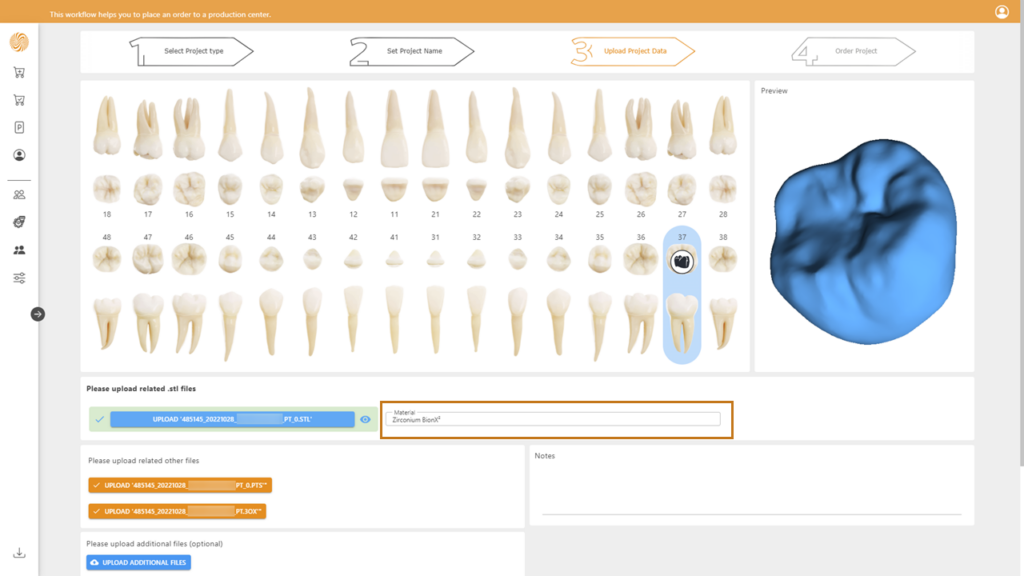
In case of 3Shape it is not possible to delete the design/model data from the metadata and change the material and color information!
Step A4
The offer is generated. Please accept the terms, optionally select additional add on articles, choose your
shipping address, delivery method and finalize the order by pressing the button: “Order with obligation to pay”.
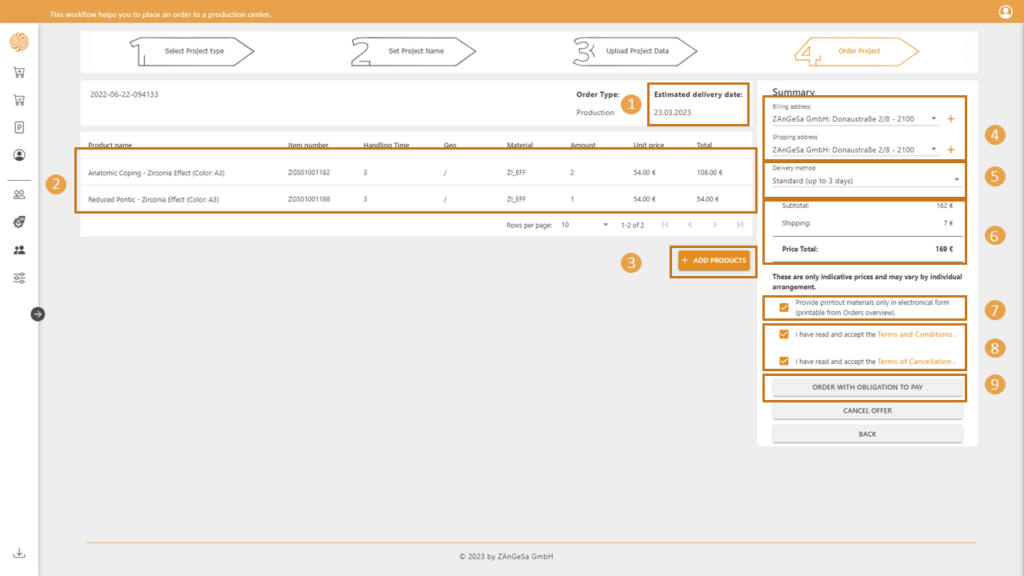
- The estimated delivery date (when the order is handled over to the delivery company or ready for pick up)
- The generated offer, please check the articles!
- Select additional add on articles in case of need.
- Select/define new shipping address
- Select shipping method. Attention, this may lead to different costs!
- Control the resulting costs.
- Set your preference concerning the printouts
- Accept terms and condition
- Finalize the placement of your order!
Note: In case if the order was not placed (was cancelled, the browser was closed, etc.) you can find it under the My Projects and reenter the order process or delete it from the cloud storage.