Projects are representations of your dental cases.
Define exactly the type of treatment, material and more for selected teeth
Projects are representations of your dental cases.
Define exactly the type of treatment, material and more for selected teeth

Project status lets you keep track of remaining tasks.

Get an overview of all construction parts.
Work collaboratively on projects with your peers.
Order directly from your chosen production center.
See Multi-Die on how to work with such projects.
Click on Projects in the left sidebar to access your projects.
Projects Screen

From here, you can view all your projects, create new ones and archive or delete them (see Deleting, Archiving & Copying Projects).
There are several ways to start a new project:

On the Projects screen, select the Plus-icon.
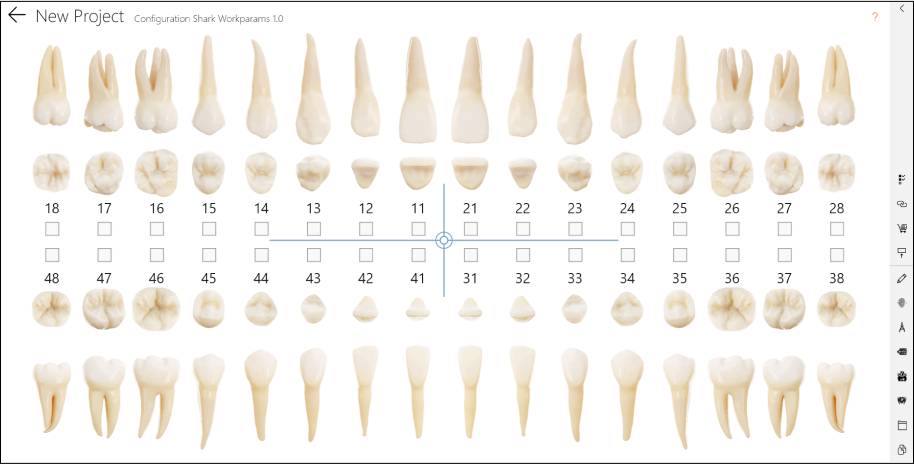
Here, you can configure the basic parameters of your project.
Internal job number

Project Name

gets passed to CAD
Color Scheme

Notes

Worktype configuration

Selection may differ
Multie-Die project
Only available on supporting worktype configurations!
Antagonist type
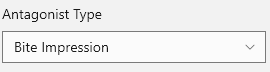
Only available on supporting worktype configurations!
Tooth Color


On the Projects screen, select the Import-icon.
Existing projects on your disk can be loaded by selecting the appropriate file.
Supported file formats:
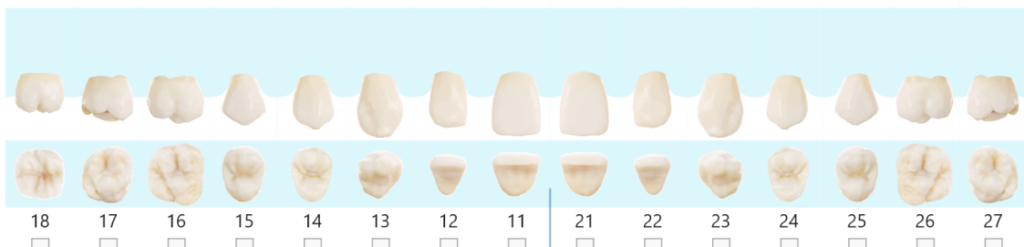
The project screen shows the associated worktype for individual teeth.
Expand Actions sidebar
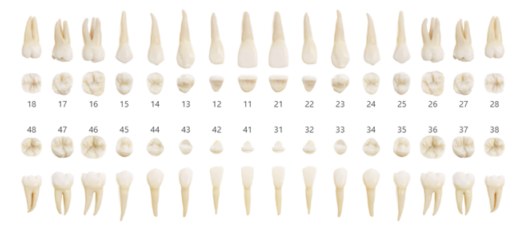
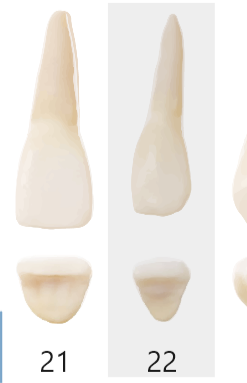
The notation system can be changed in the Settings. The standard is FDI-notation.
Worktypes describe exactly, which indication (treatment) is proposed for which teeth.
This includes the type of treatment, material, the detailed parameters and optionally color to be applied.
To apply a worktype, you can either select a tooth individually or select multiple teeth at once to apply the same worktype for all of them.
Treatments affecting the entire jaw are automatically applied to all affected teeth.
To apply a worktype to a single teeth, simply select the tooth by clicking on it.
This will open the worktype selection.
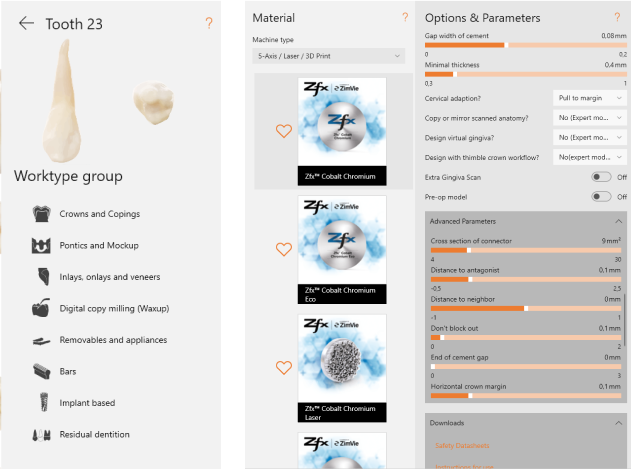
After choosing the desired worktype group, you will then be asked to pick a material and finally adjust the Options & Parameters.
Multiple teeth can be selected to apply the same worktype to them all at once!
This can be done either by using the cross-hairs to select certain parts of the jaw:

or by selecting them using the checkboxes.
Clicking with ctrl or shift can also select multiple teeth.
(Selecting with shift only works within one jaw)
Using the action bar at the top, you can then
Some worktypes, like a Full Denture, affect an entire jaw. For these, it is sufficient to apply them to only one tooth – all affected teeth will get the worktype applied automatically!
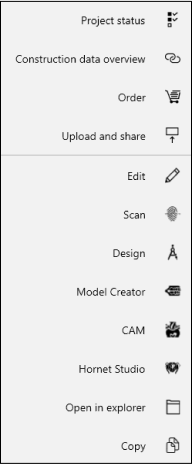
Select Construction data overview in the right sidebar.
This shows you a list of all required parts.

Construction information is usually generated by the CAD software.
Select Project status in the right sidebar.
The project status automatically updates itself when certain actions are taken.
Before Ordering
Scanned
Data is scanned
i.e. there are stl- or obj-files existing
Designed
Model Designed
optional
Screenshots
Scene files
Project folder contains history file of the design
After Ordering
Uploading
To Confirm
Production Center has received the order but has not downloaded the files yet.
Verification
Milling Center has downloaded the files and is reviewing them.
Approved
Order was accepted by Milling Center. An Order Form is produced.
In Progress
Milling Center is working on the order.
Manufactured
All parts have been manufactured by the Milling Center.
Quality Check
The order has passed the Quality Check by the Milling Center.
Ready Dispatch
Order is ready to be shipped.
Declaration of Conformity can be printed.
In Transit
Order has been dispatched.
Completed
!
Add-On orders go straight from Approved to Ready to dispatch!
Connect works with a variety of scanners and CAD-softwares. These can be started from within the projects page.
To set up custom programs or scanners in Connect, see Integration.
Select Scan in the right sidebar of a project.
From there, select your scanner to start the scanning process.
Select Design in the right sidebar of a project.
From there, you can select the software you wish to start.
Select Order in the right sidebar of a project.
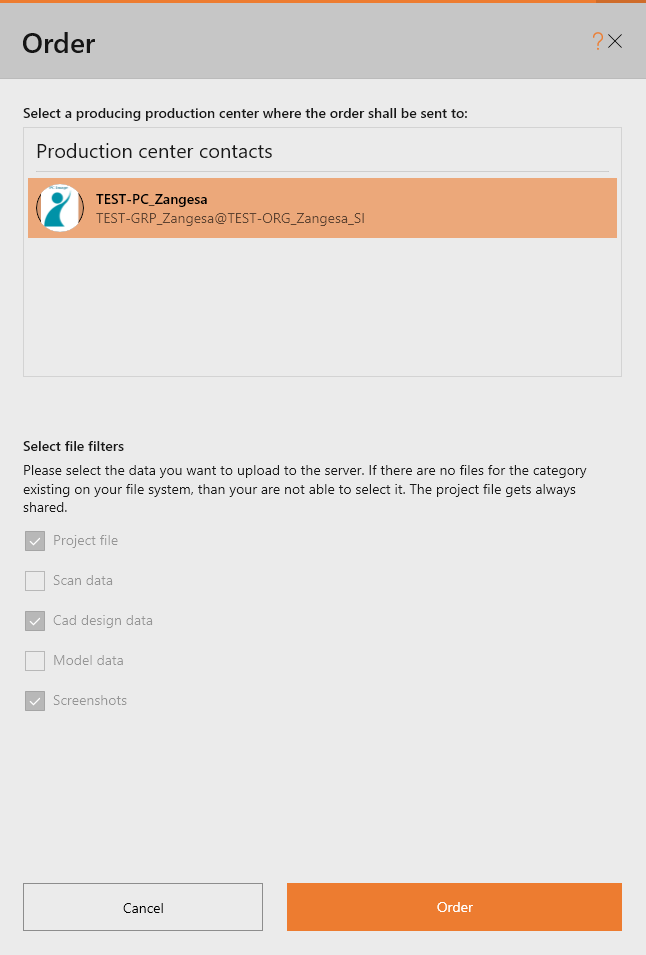
After selecting a production center and which files you wish to share, you can then
After accepting the Terms and Conditions, you can Order with obligation to pay.

See Orders for further information.
From the Projects screen, selected projects can be copied, archived and deleted.
Select projects with their checkbox

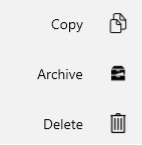
Select appropriate action in the right sidebar.
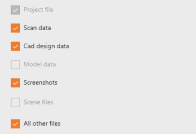
For copying projects, you can choose which data gets copied to the new project.
Archived and deleted projects are moved to a special folder. These projects are available through the projects screen filters.
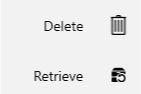
To restore them, simply select and choose the appropriate action in the right sidebar.
Projects are archived automatically when they are unused for a certain amount of days.
Deleted projects are removed entirely after being deleted for a certain amount of days. This includes any backups on the server!
